How to Upload Photos to Websites Without Coding
Learn how to upload photos to websites in six steps: export the right format and size, remove private data, drop your folder, and share a live link.
You've picked the photos for a bakery menu, a wedding album, or a client portfolio. They look right on your phone, but now you need a website link you can send without attaching a folder or explaining how to open it.
Learning how to upload photos to websites isn't just about finding the upload button. The useful checks happen around it: making files small enough to load comfortably, removing hidden location data, and choosing an address you won't need to change after sharing.
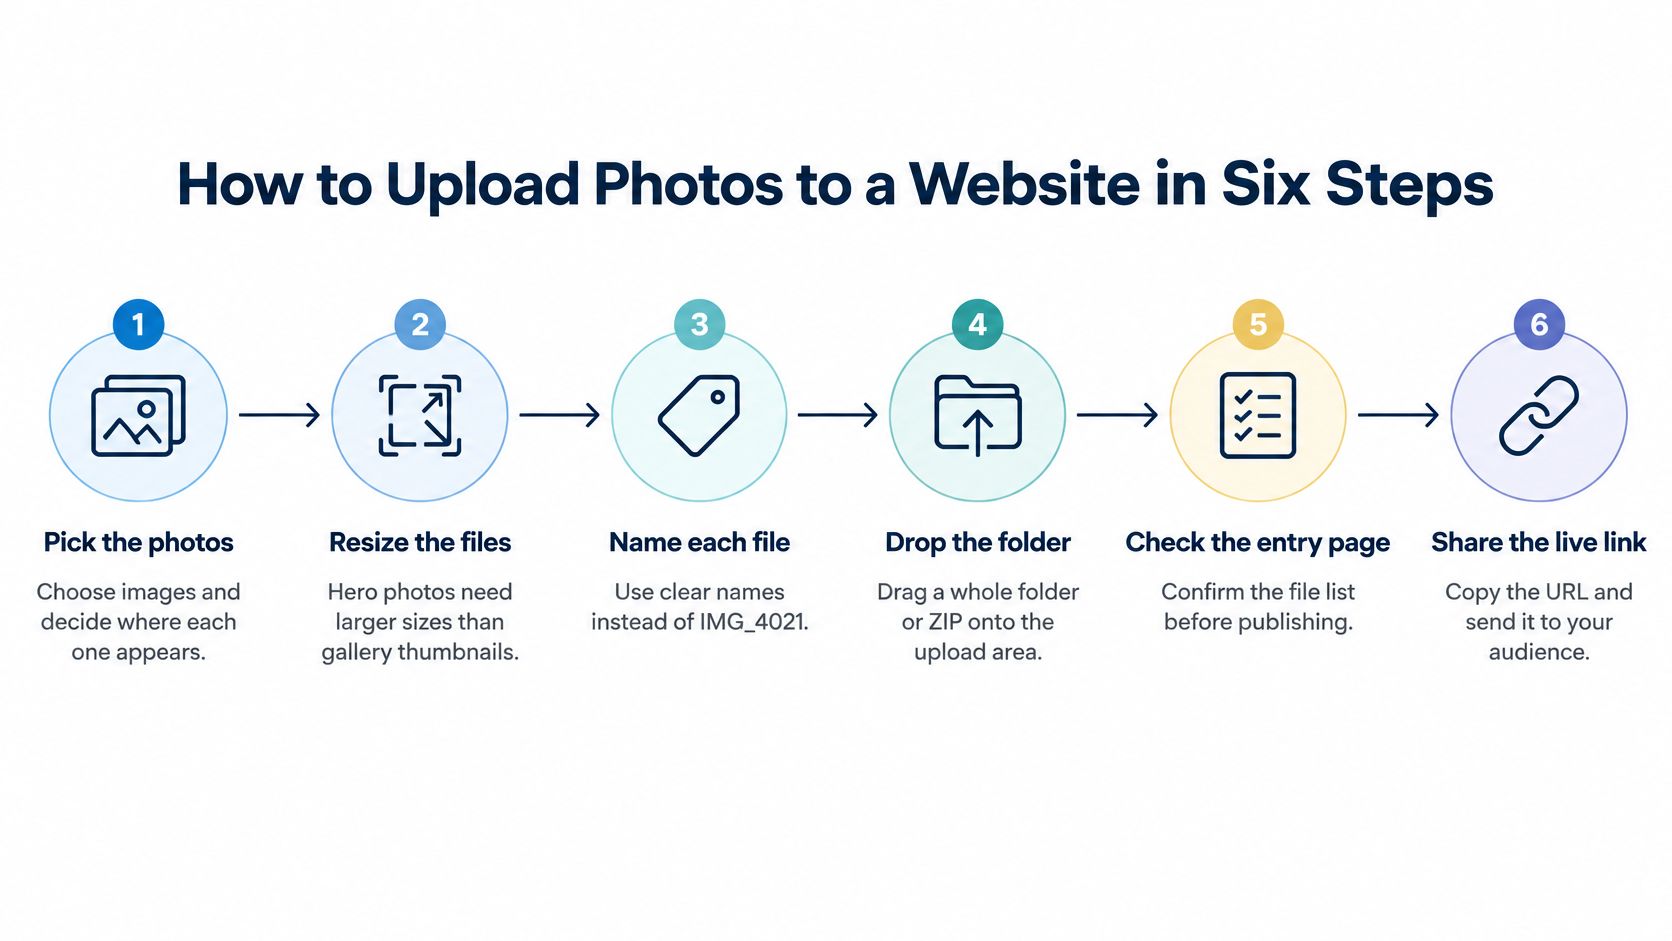
How to Upload Photos to a Website in Six Steps
You can have a live link in about twenty seconds once your folder is ready. Preparing the photos takes most of the effort.
- Pick the photos and their places. Decide which image opens the page and which belong in the gallery. A wide bakery-counter photo needs more detail than a small thumbnail of a cupcake, so don't export everything at the same size.
- Export copies in a suitable format. Use JPEG for ordinary photos and PNG for logos or screenshots. Around 2000 pixels on the longest side is a starting recommendation for a full-width photo, not a hosting requirement. Use the more specific guidance in the table below for other placements.
- Remove location data. Look for a location-sharing setting in your phone gallery or a metadata option when exporting. Check the exported copy rather than assuming the setting changed your original.
- Gather and name the files. Put upload-ready copies in one folder. Use plain names such as
beach-sunset.jpg, avoiding spaces and accents for simpler sharing. Keep untouched originals in a separate folder. - Drop the folder and publish. Sign in or sign up, drag the folder or its ZIP archive onto our upload area, choose a subdomain, and hit publish. Our image portfolio walkthrough follows this folder-to-link process.
- Open the published link on a phone. Check that every photo appears, the opening image is the one you intended, and small details remain readable. Don't send the link just because the upload finished.
The whole path is easier to follow when you can see it together.
Practical rule: Upload working copies, not the only copies you own.
For a wedding folder, that means keeping the full-quality photographs separate from the lighter versions intended for viewing online. You can change the web copies without risking the originals.
Photo Formats and Sizes to Export First
| Photo type | Best format | Longest side | Target file size |
|---|---|---|---|
| Full-width hero photo | JPEG or WebP | Around 2000 pixels as a starting point | Keep detail while reducing download size |
| Article or page photo | JPEG or WebP | Match the intended display area | Smallest export that still looks sharp |
| Gallery thumbnail | JPEG | Match the thumbnail area | Under 100 KB as an export goal |
| Logo with transparent background | PNG or SVG | Match the displayed logo size | Under 100 KB as an export goal |
| Screenshot with text | PNG | Large enough to keep text readable | Prioritize readable lettering |
| iPhone photo, exported as JPEG | JPEG | Resize for its intended placement | Check the exported copy |
These are export recommendations, not host limits. File size depends on the image's detail, dimensions, and compression, so there's no guaranteed download size for a particular width.
A bakery's opening photograph should stay clear across the page. An article photo only needs enough detail for its content area, while a gallery thumbnail shouldn't carry the same oversized file. A transparent logo needs clean edges, a menu screenshot needs readable text, and an exported phone photo should be sized for its destination rather than its camera resolution.
Choose the format for the image
JPEG uses lossy compression, which reduces file size by discarding some image information. PNG is lossless, making it useful for screenshots, diagrams, line art, and transparent graphics, as explained in the image format guide.
For a vacation photograph, JPEG or WebP is usually a sensible choice. For a transparent bakery logo, PNG is practical; keep an existing SVG version if your upload workflow supports it, but don't expect converting a photograph into SVG to improve it.
WebP can reduce download size, while AVIF can offer stronger compression with processing and compatibility trade-offs. A newer format isn't automatically the best workflow: when an upload form accepts only common formats, JPEG remains a straightforward choice for camera photos.
Resize to the intended display dimensions first. Lower the quality setting only if the file is still too heavy.
For example, a 4000-pixel phone photo might occupy several megabytes, while a resized 2000-pixel JPEG export might occupy a few hundred kilobytes. That's an illustration, not a promised conversion result. Inspect your actual export, especially faces, lettering, and fine patterns.
The reason to bother is practical. The 2025 Web Almanac page-weight measurements report median home-page image downloads of 1,059 KB on desktop and 911 KB on mobile. Don't make every visitor download camera originals when smaller display copies do the job.
Large Batches, ZIP Files and Phone Photos
A carefully prepared album can still become awkward when you're working from a phone or gathering files from several people. Organize around the situation rather than repeatedly retrying the same upload.
Match the folder to the job
- A large event album. Every site is limited to 1,000 files regardless of plan. A 300-photo event fits within that file-count limit, but a 2,000-photo archive needs separate sites. Grouping by event makes the resulting albums easier to browse, too.
- A phone or restricted work computer. A ZIP archive, a package containing your files and folders, can be easier to select than a whole folder. For a predictable upload, package one clearly named top-level folder with the photos inside, then inspect the archive before sending it.
- Phone photos that won't open. iPhone photos may arrive as HEIC files. For future captures, look under Settings, Camera, Formats for Most Compatible; for existing pictures, use an export or sharing option that produces JPEG. Many Android phones already produce JPEG, but check the file rather than assuming.
- A portfolio with supporting documents. Keep the photo album, short video reel, and project PDF together when they belong to the same presentation. Supported mixed uploads include MP4 and WebM videos, PDFs, Word documents, and spreadsheets.
- The only copy is on your device. Make a separate backup before deleting anything locally. You're responsible for keeping your own copies, and our hosting shouldn't be the only place you store work you care about.
Check storage as well as file count
Fitting within the file limit doesn't mean a batch fits within your available storage. A folder of camera originals can be much heavier than a folder containing the same number of resized photos.
Check the complete folder's size in its information or properties panel before uploading. If it's too large, remove duplicates and export smaller display copies rather than compressing the same files repeatedly without looking at the result.
For a wedding album, separate the rehearsal dinner from the ceremony if that helps the audience. Splitting a collection should make it easier to use, not merely move an untidy archive into several untidy links.
What Happens Between the Drop and the Live Link
Suppose your folder contains a bakery's opening photo, product pictures, and a menu PDF. Dropping that folder begins the publishing process; you don't need to select each file separately.
The upload stage is where those local files become a hosted collection.
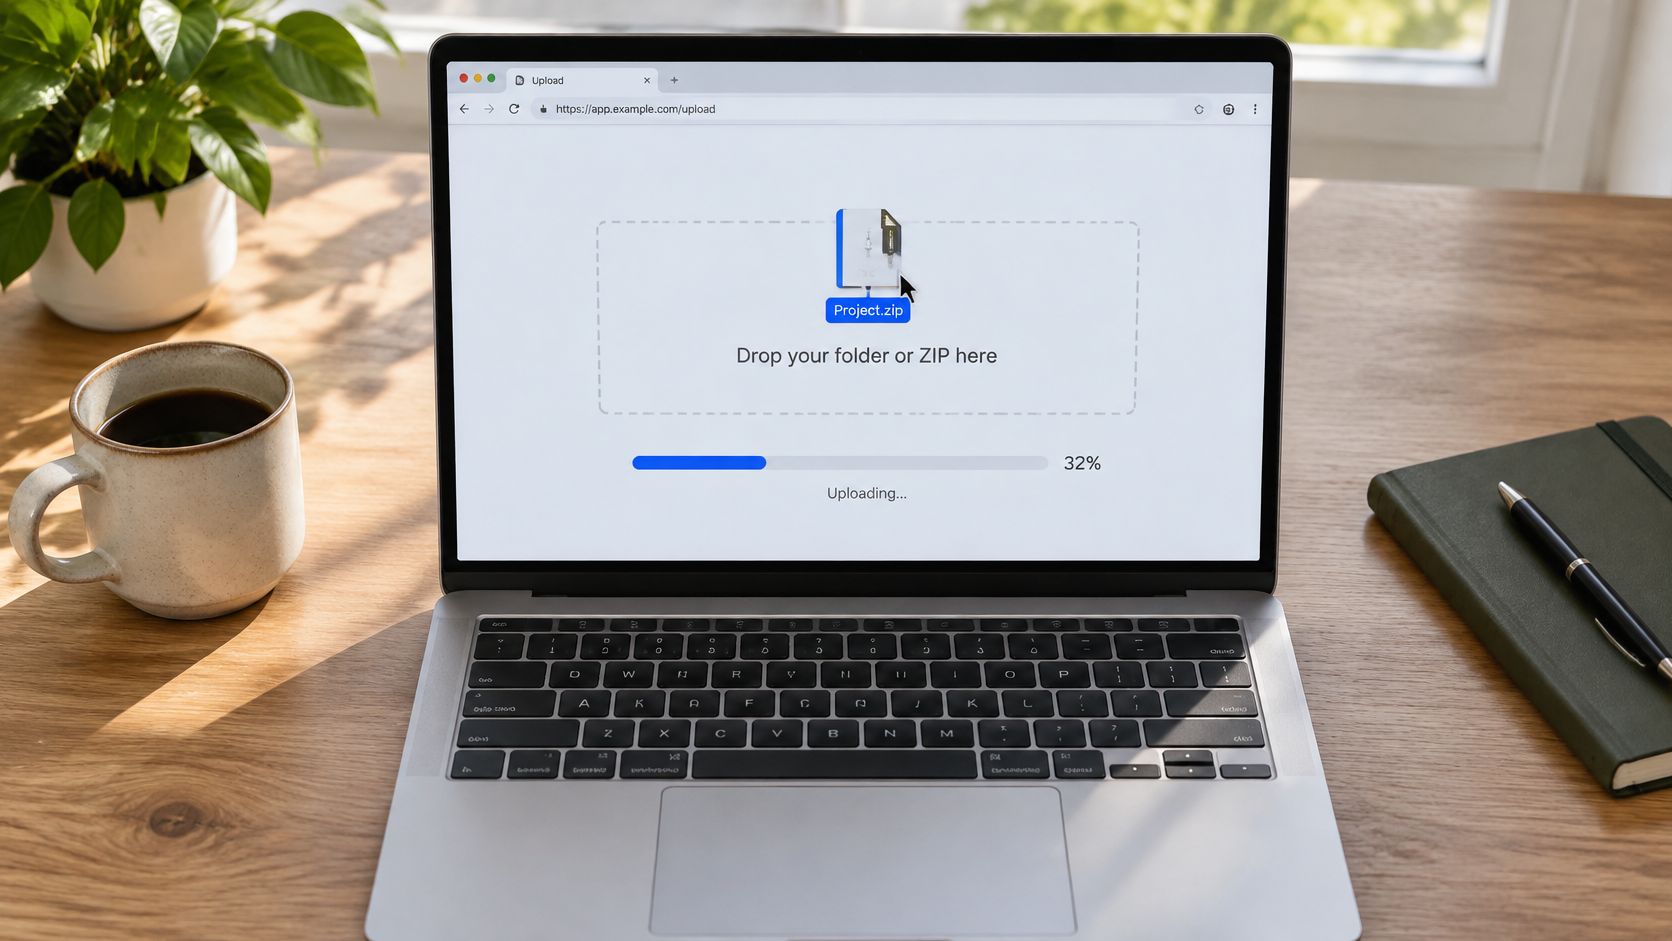
Finding the opening page
We pack and stage the upload, find the homepage, scan the files, and allocate an address. For an existing website folder, the opening page is usually index.html. If several pages exist without an obvious homepage, select the one visitors should see first.
A photo-only folder is different from a prepared website. Our process can provide a thumbnail index for the images, so you don't need to write a homepage yourself. The static hosting walkthrough is useful when your folder already contains pages and supporting files.
Keep the intended starting point obvious. A client shouldn't land on an old draft when you meant to show the finished portfolio.
Checking files before publication
A file's name doesn't establish what it contains. Renaming a document to photo.jpg doesn't turn it into an image. The file-upload security guidance recommends validating actual file types rather than trusting the browser's reported content type.
Our staging process scans every file. Safe image handling also requires checking contents, rejecting malformed files, and applying reasonable size and dimension limits; a successful filename check alone isn't enough.
Before uploading, make these local checks:
- Open suspicious files. If a photo won't open on your laptop, re-export it rather than expecting hosting to repair it.
- Remove stray files. Leave out items such as
Thumbs.dband unrelated drafts that don't belong in the published folder. - Check unexpected video formats. Convert an unsupported clip to an accepted format instead of changing its extension.
The video shows the drop-to-publish sequence.
Receiving the result
The result includes a clean link and a QR code, with the portfolio served over HTTPS, the encrypted connection indicated by the browser. The address gives you something to send; the QR code makes it convenient to open that same destination on a phone.
Publishing is the handoff from your computer to a public-facing page. It isn't confirmation that the folder contains only the photos, descriptions, and identifying information you intended to share.
Settings to Check Before You Share the Link
A live page isn't necessarily a finished page. A gallery can load successfully while still exposing a home address through photo metadata or leaving a screen-reader user without the information everyone else receives.
Run these checks before copying the address into a client message.
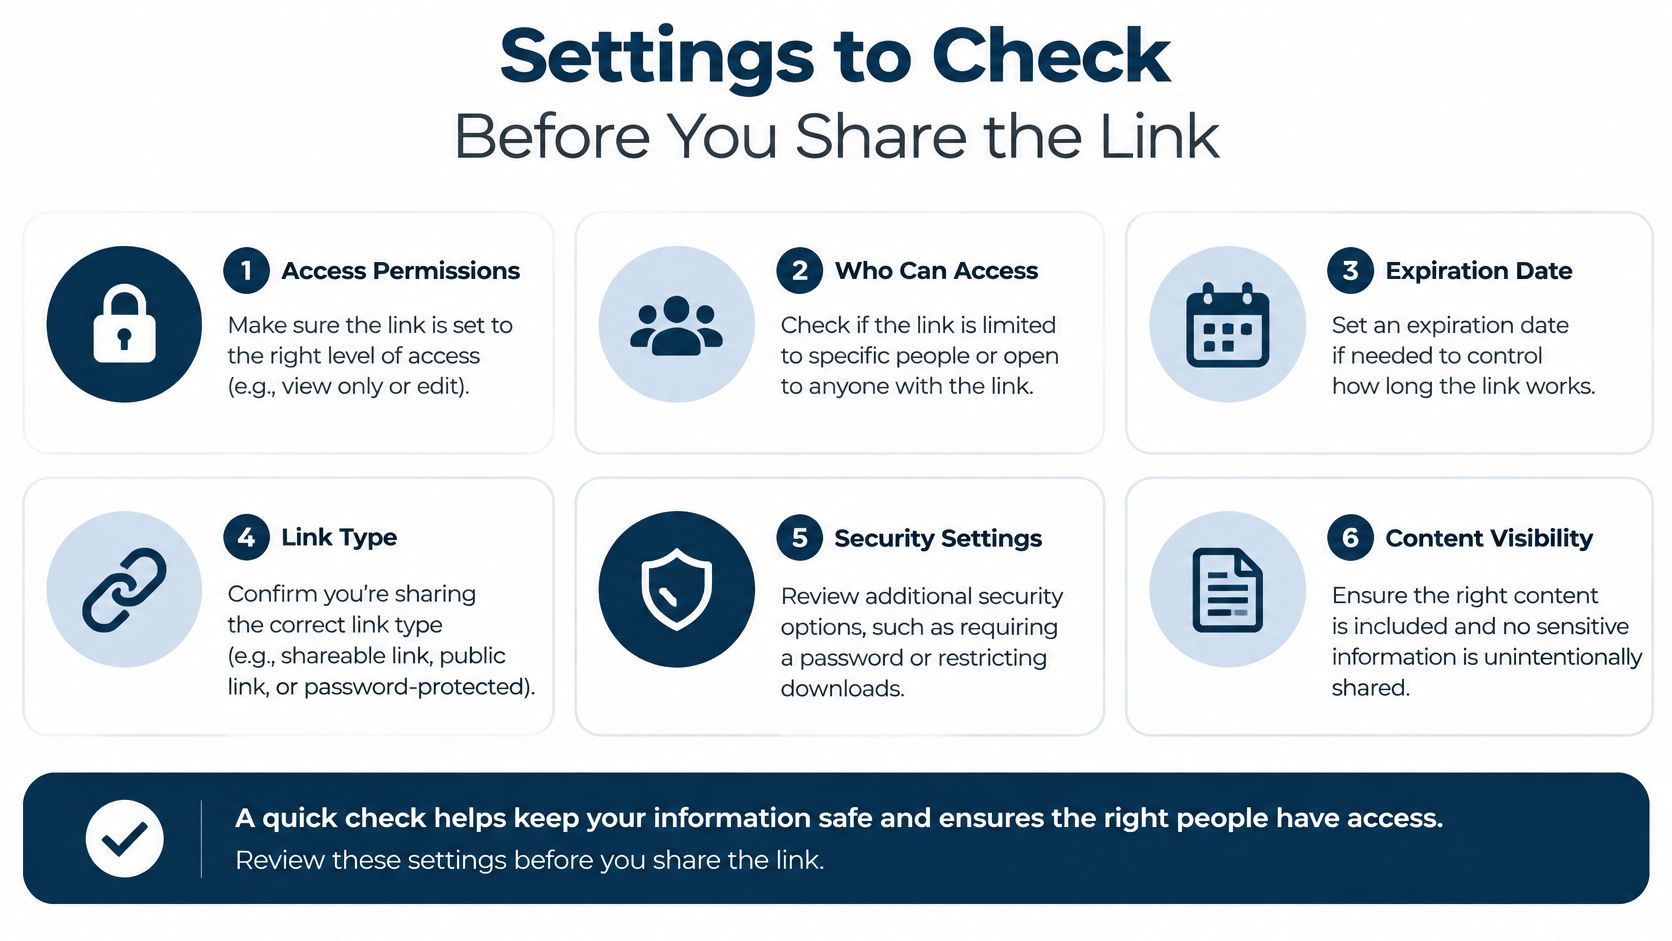
Check the address and hidden information
Choose the final subdomain first. A readable name such as client-name-portfolio tells the recipient more than a camera filename. Renaming the address after sharing can leave recipients using the old link; replace the content at the existing address when you're updating photos.
Inspect metadata, the information stored alongside the picture. Check your phone's photo information panel for location, and use export options to remove GPS coordinates and unnecessary identifying fields. The documentation on JPEG metadata processing confirms that upload workflows can read embedded titles and keywords, so don't assume hidden fields are ignored.
Share the image you intended, not the location history attached to it.
Check meaning, mobile display, and access
- Write useful alternative text. Alt text is a textual replacement for an image's purpose. “Students planting trees in a community garden” communicates more than “photo of kids.” The accessibility guidance on text alternatives distinguishes informative images from decorative ones, which can use empty alt text.
- Keep essential information available as text. A bakery menu shouldn't communicate its offerings only through a photograph. If there's no alt-text field, add a visible description beside the image, but don't mistake a caption for a complete replacement for properly implemented alt text.
- Scan the QR code. Check cropping, lettering, and navigation on your phone. An attractive laptop preview doesn't tell you whether the menu is readable on a small screen.
- Choose the audience. A public portfolio and a private client proof need different access decisions. We support password protection; use it for restricted review rather than treating an unadvertised address as private.
Our client-sharing walkthrough helps with that handoff. Before sending, follow this sequence: finalize the address, inspect metadata, check descriptions, test the phone view, then confirm access.
Fix Upload Problems, Then Publish a Test Folder
| Symptom | Likely cause | Fix |
|---|---|---|
| Blank page after publishing | No file named as the homepage | Rename the main page to index.html or pick the homepage |
| Photos show as broken boxes | Links point to a folder on your computer | Use relative paths such as images/beach.jpg and keep the folder structure |
| Upload rejected with an error | File is not a real image or the type is unsupported | Re-export as JPEG or PNG and retry |
| Page loads slowly on phones | Full-size camera originals | Resize to the display width and recompress |
| Old photo still shows after an update | Browser cache | Hard refresh the page or open it in a private window |
| Shared link stops working | Subdomain was renamed after sharing | Send the new link and avoid renaming again |
Start with the homepage and broken-photo checks. For an existing website, a relative path tells the page where an image sits inside the uploaded folder, instead of pointing to a location that exists only on your computer.
Keep the same folder structure when publishing. Moving the pictures out of an images folder without updating the page references can leave the page intact but its photos missing.
Test before the real deadline
Publish a small test folder of five photos before preparing the full collection. Include an opening photograph, a detail shot, and an image with lettering so you can judge different kinds of content.
Use a deliberate final check:
- Preparation. Confirm the privacy and description checks are complete and the subdomain is final.
- Phone view. Open the shared address, inspect the opening page, and check whether every photo loads.
- Laptop view. Look at full-width sharpness, captions, and the expected homepage.
- Update test. Replace an image while keeping the public address, then confirm you can see the replacement.
Our Free plan costs $0 per month and includes 2 sites, 25 MB storage, video files up to 25 MB, an Upfling subdomain, free SSL, API and MCP access, and email support. No card is needed. At roughly 500 KB per photo, that storage represents about 50 photos before allowing for other files, making a modest test folder a practical starting point.
For examples of different collection types, our published examples include a 200-photo studio portfolio, a travel album, and brand guidelines. Use those categories as organizational ideas, not as a reason to upload your entire archive before testing.
Upfling turns a prepared folder of photos or a ZIP archive into a shareable gallery with a live address and QR code. Visit Upfling, publish your test folder, and check it on your phone before sending the finished collection to clients, friends, or readers.